Using HubSpot’s FTP is really handy when you want to add new fields to an old custom module, or want to transfer fields between custom modules. It can save a lot of manual and repetitive field setup time, as well as prevent errors if you want identical fields between modules.
We’re going to show how to add fields via FTP.
As a way of framing why you would need to do this,In order to support the new Crankshaft framework, I am going to show you how to add the advanced settings field group to your own custom modules. For those unfamiliar with the CrankShaft project, check out the Github repo here.
Prerequisites:
1. Basic knowledge of JSON
2. FTP client installed (we’re using FileZilla in our screenshots)
3. HubSpot Design Manager 2 -Design Manager 1 is no longer available, so check this off your list.
Step 1: Find your module via FTP
FTP in to HubSpot. Go to your portal’s folder, then in the Designs folder, find your custom module, it will display as a folder with .module in it’s name.
Open the folder. Open the fields.json file in your code editor of choice.
If you are copying fields from another module, go to that module and open it’s fields.json file as well. In our case we are copying from the CrankShaft Repo.
These JSON objects store the data that produces fields in HubSpot’s design manager.
In our case the fields are stored in the crankshaft repo, so we can use the “Advanced Features Module” fields.json file in the CrankShaft Github repo. Copy the json object.
Copy the desired fields data like the image below. In this case I am copying ALL of the fields and all of their data.
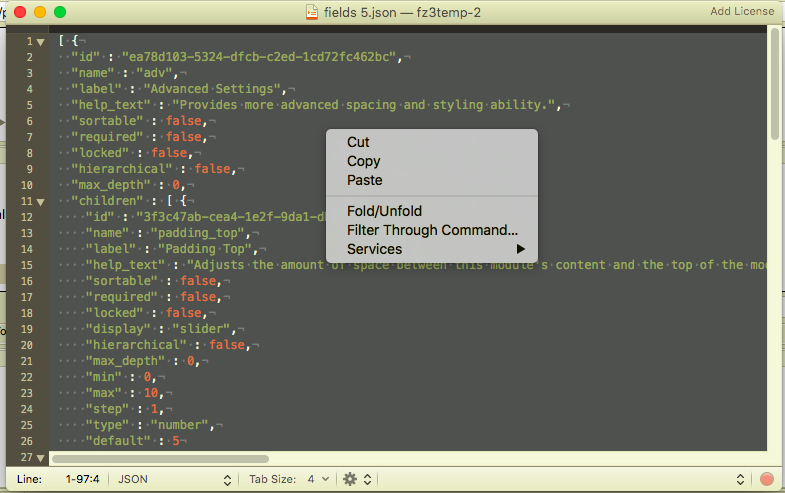
Notice where the open/closing bracket and curly brace begin and end, and note commas between them. This is where the basic understanding of JSON comes in ;)
The fields are labeled with the same name in the Design Manager so it’s clear which are which. If needed you can rename them, the ID is what the data is tied to, so renaming shouldn’t hurt.
Step 2. Paste JSON into your other module
Find the module that you want to add the fields to. Open up the “fields.json” file in your new module the same way you did with the first module.
Add a comma after a curly brace where you want to insert your fields. Paste your new fields in. It can help to collapse your code in the editor to make sure it’s copying and pasting in the right spot. Note where fields are nested within each other.
Where you paste the code depends on where you wan the fields to show in the editor and what fields already exist.
Step 3 – Delete the IDs for your pasted-in fields.
According to HubSpot developer Anthony Pizzuro, it is a good idea to clear the HubSpot IDs for the fields you are pasting in. This ID is generated automatically, and could in theory conflict with the original module’s ID if they are on the same page.

Step 4 - Upload to the HubSpot server
Once you have your new fields pasted in, save your modified file in your text editor. FileZilla and many other FTP clients will pop up a notification about sending the modified file to the server.
Select Yes.

That’s it!
The file will upload to the server if everything worked. You should be able to refresh your module in Design Manager 2, and the new fields will show up.

And here they show up in Design Manager 2. Magical!

Before

After!
Troubleshooting:
If it doesn’t work, you may have pasted the JSON in incorrectly. Check for syntax errors and try again. Viewing the FTP client’s command line may yield some error messages that will help you find the error.
If you doubt whether the server will accept changes, make a small tweak to the module (like slightly changing the help text in an existing module) to see if it will work. Then you will know your FTP is working properly.
Bottom Line
This really is just glorified copy and pasting. However, it is easy to make a syntax mistake or have a conditional set on a field which is invalid.
As you can see from the before and after, you can paste in as many fields as you want at once. This method can save you a boatload of time and we hope it does!
Written by Jim, Updated by Jon McLaren